Log in

MISSION CONTROL
Welcome to mission control, this theme will show you how to code your creations! You will need to have basic knowledge of the working of the BYOR-kit. You can get this knowledge by doing the first missions, about BYOR Basics. For this mission you will need the BYOR starter-kit and the micro;bit chip.
Start the video below to hear the first transmission from the spaceship.
Protocol Alpha
Turn on an output-part with brain power!
1. Connect the micro:bit
Use the micro-USB cable to connect the micro:bit to your computer.
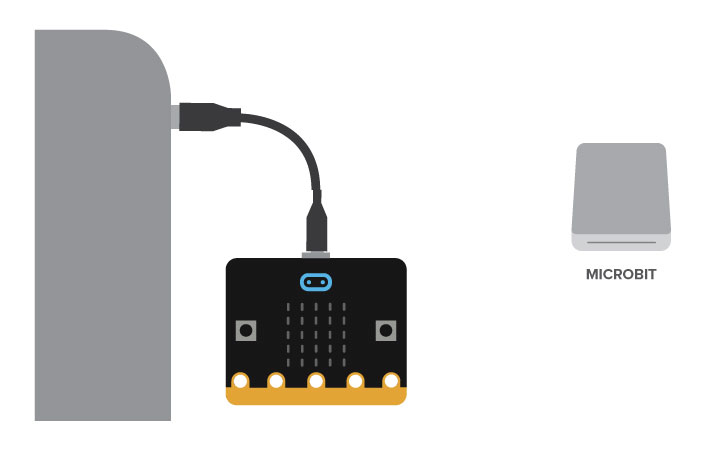
You will see it appear as you would a USB stick, later we will drag and drop code-files there.
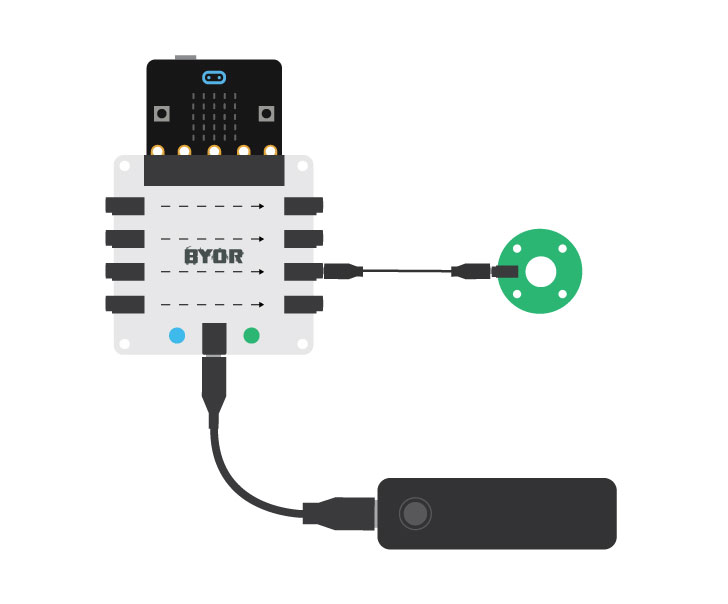
Connect an output part
Get your Easyboard and connect an LED to output 13 (you can see the output-numbers on the bottom). We will make a code that will turn that LED on.
2. Make a code!
First we will make a code, it’s super easy and can be done online. Go to makecode.microbit.org/#editor, here we will do the programming, making the code which makes the chip think.
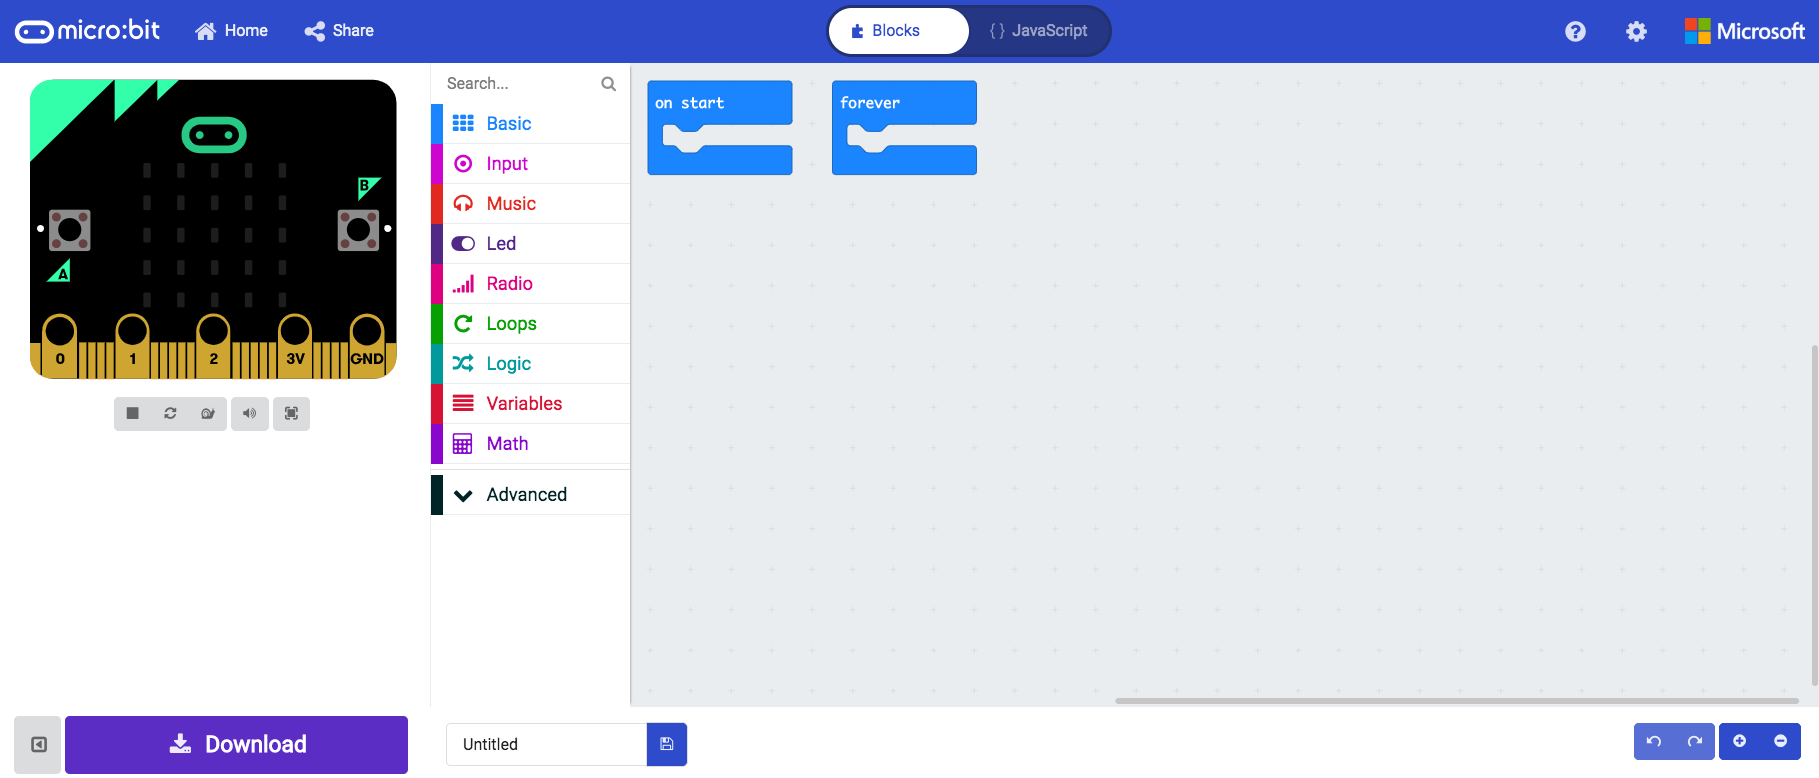
Search for Digital Write in the searchbar and drag the Digital Write block to the Forever block. Make sure it snaps into the Forever block.
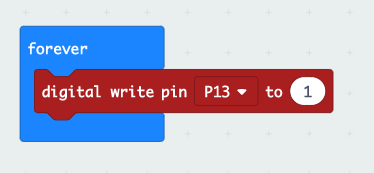
From the dropdown menu, select P13 and fill in the number 1 in the white box, so it resembles the image above.
Upload your code!
Now save the files using the save-button. Save it onto te micro:bit drive. Wait a bit and the code is on the micro:bit. Attach the micro:bit to your Easyboard. Power the Easyboard and the LED will turn on. The brain is working!
Not working? Make sure the Easyboard has power and the connectors are all the way in. Still not working? Learn more in the programming manual
Protocol Bravo
Wait a second..
Make a blinking light module
Now we are going to make the LED not just turn on, but also off, and on again, a blinking light! We will use the same block to turn the LED on (1) and off (0). While it is on, we want to chip to wait for a short period of time, we will use the Pause block of this.
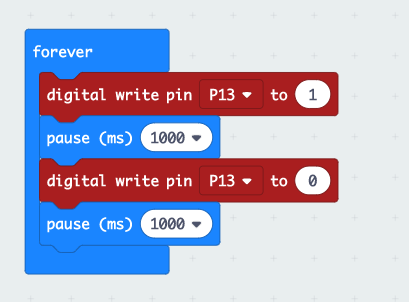
Add another Digital Write block to the Forever block and add two Pause blocks. Fill in the boxes to make it resemble the code shown above.
Attach the micro:bit to your computer again and save the file onto te micro:bit drive again. Wait a bit and the code is on the micro:bit. Attach the micro:bit to your Easyboard. Power the Easyboard and the LED will start blinking! Fill in different Pause times to make the led blink faster or slower.
Protocol Charly
Different blinkers
What more can we use?
Attach different output-parts to see how they respond to your code. What do you expect they will do? And do they?
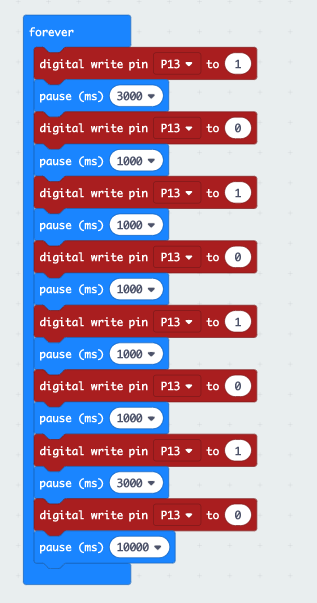
Using a blinking LED you can communicate whole words and sentences as well. This can be done using Morse code. With Morse code, timing is everything. You can make short or long blinks and it means different things. Look at the image below. Can you program the Easyboard in such a way that you can make the first letter of your name? Remember, the stripes take 3x longer than the dots.

Below is an example of code for the letter X (with a 10 seconde break at the end)
Can you send us your name in Morse code? Build a cool device that does this using the LED or another output-part. Send us the video using the portal below 🙂
Show us your creation!
Be sure you are logged in to receive your space tokens!
Log in
Upload a video of your creation and send us the link!